


Step 1: Measure Your Nail Beds
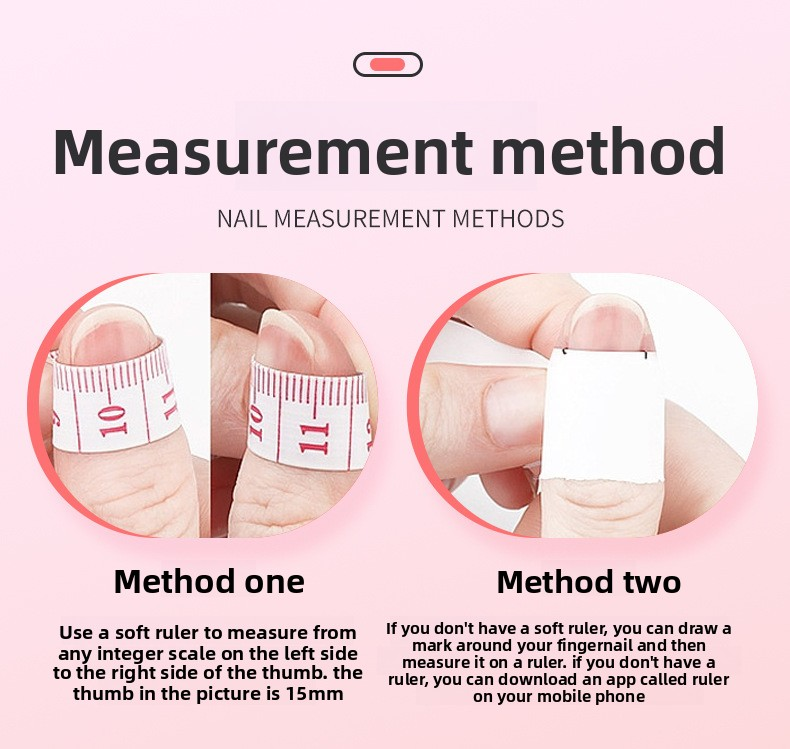
The critical measurement is the width of your nail bed at its widest point (usually across the middle). You only need basic tools: a ruler (or measuring tape), a pen, and a small piece of paper/tape.
Method 1: Ruler + Paper/Tape (Most Accurate)
1. Place the paper or tape flat against your natural nail bed.
2. Mark the left and right edges of the nail’s widest curve with a pen.
3. Remove the paper/tape and measure the distance between the two marks with a ruler, recording the result in millimeters (mm).
Method 2: Direct Measuring Tape
Hold a soft measuring tape horizontally across the widest part of your nail bed, ensuring it follows the natural curve. Read the measurement directly in mm.
Pro Tip
Measure each finger individually—thumb, index, middle, ring, and pinky often have different sizes. Record all measurements (e.g., Thumb: 16mm, Index: 12.5mm) for easy reference.
Step 2: Match to a Size Chart
Most brands use either numerical sizing (00–9) or letter sizing (XS–XL), with measurements in mm. Always refer to the specific brand’s size chart—sizing varies between manufacturers.
Sample Standard Size Chart (Letter Sizing)
Size Thumb Index Middle Ring Pinky
XS 13mm 10mm 11mm 9.5mm 7.5mm
S 14.5mm 11mm 11.5mm 10.5mm 8.5mm
M 15.5mm 12mm 12.5mm 11.5mm 8.5mm
L 16mm 12.5mm 13mm 12mm 9.5mm
XL 17mm 13mm 14.5mm 12.5mm 10mm
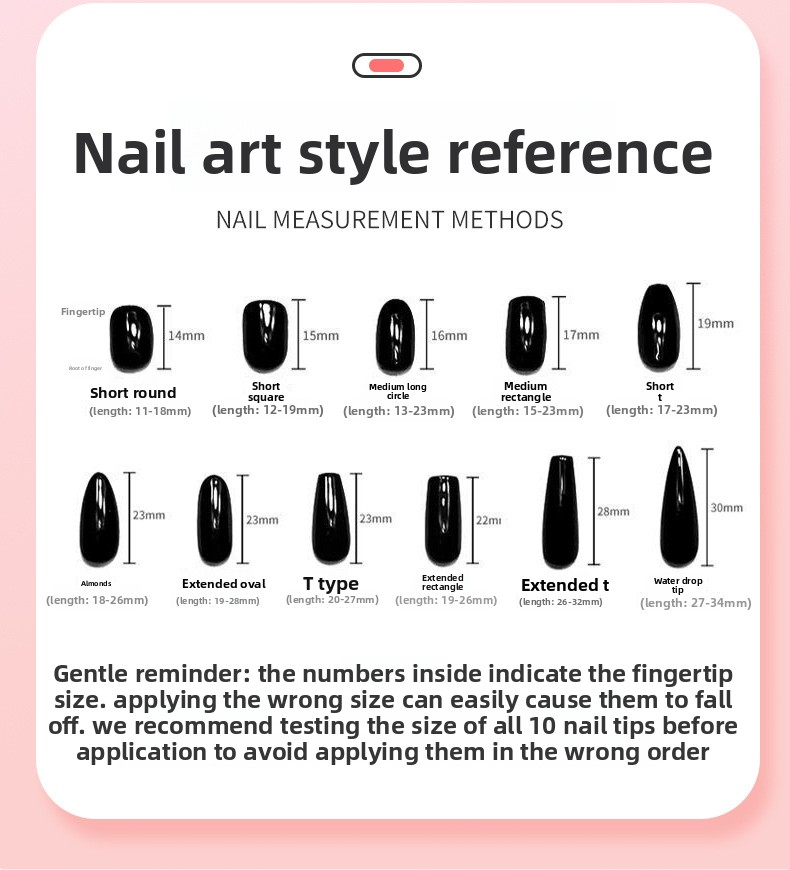
Step 3: Handle In-Between Sizes & Nail Shapes
When You’re Between Sizes
- If your measurement falls between two sizes: Opt for the larger size. You can gently file the edges with a nail file to trim it down for a perfect fit.
- Exception for flat nail beds: Always size up, as smaller nails will gap and lift.


